Thursday, February 12, 2009

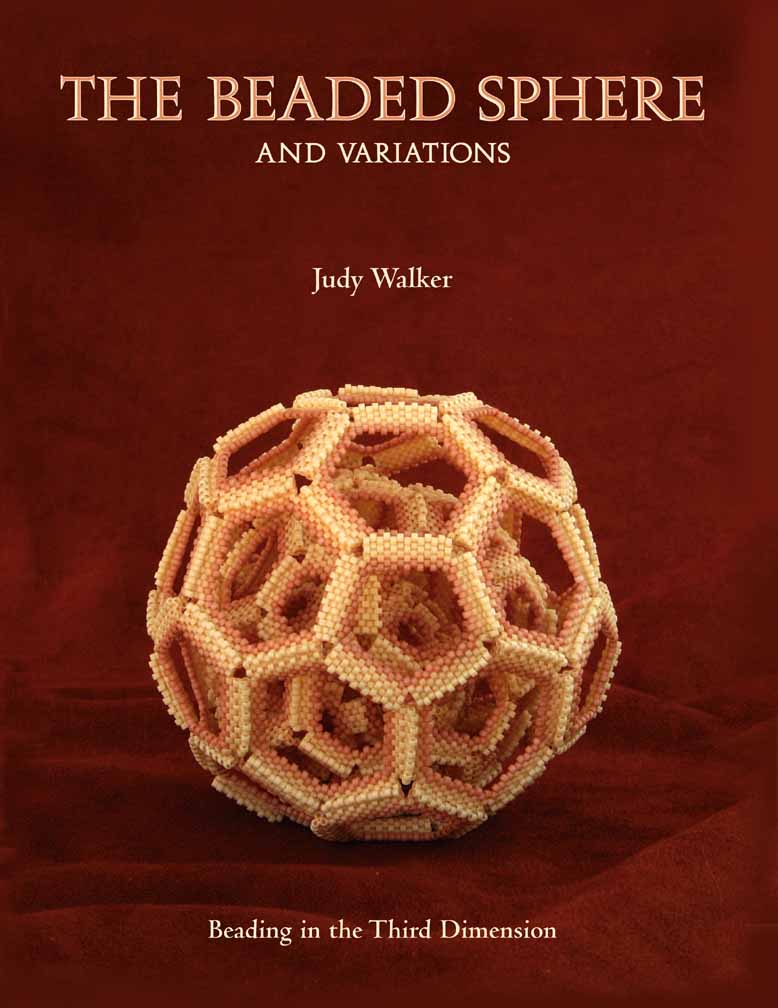
Judy Walker - The Beaded Sphere

I want to learn how to do this:


Home

Monday, February 9, 2009

Smacking Down Stupidity - Bead Wise

There's a fairly innocuous blog post on the Beading Daily website - "Five Reasons To Love Glass Beads."  Most of the reasons are pretty silly, and can be applied to any type of material:

1 - Glass Beads are Colorful.  Well so are stone beads.  And plastic beads.  Ceramic beads too.  Also polymer clay.  Wood beads are colorful when painted, and if you use enamel on metal, they can be colorful too. 

2 - Glass is a shape-shifter.  Yes, this one's an area that glass can smack down stone - but not plastic, ceramic or polymer clay.  In fact, I'd argue that the last material is the most versatile of all the mediums when it comes to making shapes.

3 - Glass beads are international.  I've got boxes of stone beads from Africa, China, the United States, Germany, Mexico, India, and metal beads from Israel, India and Thailand.

4 - Glass beads are personal.  Huh?  So an artisan made a lampworked bead.  What about the lapidarist who carved and faceted stone beads.  I can agree that there is something very charming and delightful about a representational piece of lampworked glass, but come on, artisans use all sorts of materials - glass is just one of many.

5 - Glass beads are versatile.  It's cool that glass comes in an amazing variety of shapes and sizes, but guess what, so does every other material.  I've got stone beads ranging from 2mm to 55mm and larger.

But what really got my knickers in a twist was the moron who wrote:

"The harvesting of precious metals and stones can involve environmental destruction, exploitation of workers and even wars. Glass is just as pretty and has much less impact on the planet!"

This twit clearly hasn't got a clue about glassmaking.  Yes, a hobbyist lampworker isn't having a huge environmental impact in his/her production of beads, but what about the materials themselves?  Glass beads aren't fairy dust and unicorn fur.

Glass makers aren't scooping up sand from the local beach. Silica and other elements are mined, usually in dirty open-pit operations. Silica is also one of the leading environmental causes of lung cancer (silicosis).

Pink glass gets its color from arsenic and red glass from gold.  Let's not even talk about cobalt.

There are lots of reasons to love glass beads, but thinking they are better for the environment than stone beads is just being ill-informed

Sunday, January 11, 2009

Ridiculous!

Sometimes, you just can't help but buy ridiculous materials, such as a full strand of 55mm Christmas Agate beads.  Sometimes, if you get lucky, you can actually use those ridiculous materials effectively.
Materials:

55mm Round "Christmas" Agate Disc Beads - Brazil/China
Brass lathe milled barrels - Unknown Origin
Red glass/silver lined "Pony" beads - Czech Republic
Antique Gold finished pewter toggle

Stringing Material - Black Satin 1/4 Inch Ribbon

Tools:

Big-Eye Needle
Crazy Glue
Tri-Cord Knotting Tool
Bodkin Needle

I walking into Leekan Designs about 2 years ago, and saw these lucious and ludicrous agate beads, and I had to have them.  Each one weighs about 4 ounces, and a mere four beads means a pound of stone around the neck, but that didn't stop me.   I didn't have a problem conceptualizing the necklace I wanted to make, but finding the right stringing material was problematic.  I had a spool of gimp, a type of wrapped yarn that I thought would work, since it had multiple plies.  Unfortunately, it was much too delicate (which proves that it's not how many plies there are, it's how strong each individual one is).  I had the same problem with a very small diameter rattail cord.  Leather was a possibility, but it ended up being too stretchy.

The other problem I had was how to get the thread through the agates.  Rattail, leather and gimp were all too heavy to be doubled and used with a needle. When I tried the gimp, I applied Crazy Glue to an inch of the thread, to create a self-needle.  That worked for one bead, and when I encountered an irregular hole on the second big bead, the whole "needle" collapsed.  When searching for another alternative, I came across a spool of narrow satin ribbon (100% polyester), which was a perfect solution.  The ribbon had no stretch in it, and since it could be crushed and spring back without any significant deterioration, I was able to string the beads using a Big-Eye needle.

The necklace is finished in the usual way, except no French wire, and I used "Fray-Check" instead of Hypocement to finish off the ends of the ribbon.

Materials Cost:  $35.00
Time to Complete:  3 hours (including experimenting with various stringing materials)
Difficulty:  3 out of 5

Sunday, December 28, 2008

Bad Break


For quite a while, I've been prattling on how wonderful it is to string on silk and knot between the beads. I've insisted that so long as you plan your projects properly, such as using spacers to protect against rough stone and glass edges, you will have no problems completing your project creating a lovely, and long-wearing piece of jewelry.

Well, yesterday was certainly a come-uppance for me - in the midst of knotting the first strand of a tiered necklace, my thread broke. Just ask I was snugging down a knot, one of the threads snapped. I couldn't believe it, the impossible just occurred!

I was using Gudebrod "E" weight silk thread, none of the beads were particularly rough and I was careful when knotting, not to put too much tension repeatedly at any one point. There are two explanations - one is that there was a flaw in the thread, and the other is that the thread got wounded before the project got started. As I was prepping for the stringing, there was a little tussle between the loose silk and the strand of Monolithic Agates. The silk and Agate strand seemed to develop an unwholesome relationship with each other. First the silk got caught between the teardrops, then the teardrop strand wound itself around and around and around the silk. It took a few minutes to coax the silk out of the Agates, and I then had to struggle to keep the two apart. So, it's possible that the thread got damaged, and was doomed before the project got started.

Now the question is, how am I going to fix this? I hate the thought of redoing the strand, but I think it's inevitable, since I don’t thing that just continuing to knot (perfectly possible, giving the location of the break) will result in a stable strand.

Besides, I am not sure that I love the color and size of the rose quartz between the bead caps. It's too pale against the agate.


For the record:
Materials:
Graduated strand of irregular drop-shaped Monolithic Agate - North Africa
10mm rose quartz - India
8mm smoky quartz - India
4mm garnet - India
8mm x 12mm tear drop burnt orange pearls - China
10mm vermeil bead caps - Thailand
2mm vermeil spacers - Thailand
5mm x 15mm vermeil oval jump rings (2)
Vermeil "S" clasp
1.5" gold french wire
Tools:
#10 beading needles (2)
Tri-cord knotting tool
Materials Cost: $100
Project Difficulty: 3 out of 5 (if it ever gets finished)

Sunday, December 21, 2008

Hypersthene


Materials

Cat's Eye Shaped Hypersthene Beads, Approximately 35mm x 12mm - Origin unknown
5mm x 8mm Freshwater Pearls (tobacco colored), Top Drilled - China
3mm Vermeil "daisy" spacers - Thailand
2mm Vermeil round spacers - Thailand
Vermeil toggle clasp - Thailand
Strung on Gudebrod Black Silk "F"
Tools
#10 wire beading needle (2)
Gold "french wire" fine (.5 inch)
Tri-cord knotting tool
New razor blade

What should have been an easy, 20 minute project, nearly died of shame. The lovely and delicious Hypersthene, courtesy of my dear friends, Mike and Marie Dick of East of Oz/Beadbrats, came strung on heavy woven cord, with knots between the beads. In a fit of incredible stupidity, I thought I could pull the knots through the beads instead of cutting the strand apart. What do you think happened? The knot got stuck in the center of the first bead I tried to this to. And when I say stuck, I mean STUCK. I worked on it with a bead reamer for hours, even with the flexible shaft machine. I cannot fathom how such a little bit of nylon thread could get so stuck inside a hole. Eventually, I just had to give up and continue the strand without that bead.

I think the strand came out just lovely - and the length was perfect. Hypersthene is a heavy material, Magnesium Iron Silicate, and a long strand would have been both impractical and uncomfortable. The finished length is 20", and rests comfortably on my collarbones, rather than the back my neck.

I followed my customary stringing practice, setting up one end of the clasp first, using gold french wire and two round spacer beads to protect the thread. Since I used the heavier "F" weight, I reamed the holes of the freshwater pearls to ensure that I'd have no problems when back-threading through them to finish the necklace. I also used the "daisy" style flat spacers with the 2mm round spacers against each end of the Hypersthene to keep the silk away from the sharp edges of the Hypersthene.

Materials Cost: $90.00
Time to Complete: 30 minutes (excluding the wasted time trying to clean out the stuck knot)
Difficulty: 2 out of 5

Green Glory

A commissioned piece.
Materials
20mm green agate - probably Chinese
16mm yellow and green druks - Czech
5mm frosted yellow glass - probably Czech
12mm frosted olive green pressed glass, faceted - probably West German. 
5mm polished nickel spacers - Indian
Sterling silver "S" hook and ring clasp - Thailand
Strung on Gudebrod Hunter Green 6116 "E"

Tools
#10 wire beading needle (2)
Silver "french wire" fine (1/2 inch)
Tri-cord knotting tool
New razor blade


As the necklace was intended to be worn either doubled or tripled, I cut a length of thread 100 inches long.  Because there were double knots planned at frequent intervals, I needed at least triple the finished length plus 10% working room.  I started by stringing the first block of the pattern backwards, followed by a quarter inch of french wire, then the closed ring for one side of the clasp.  I fed the thread back through the pattern block, knotting at the appropriate points.  I threaded a second bead needle on the main part of the thread, doubled the thread and strung the remaining beads.

The beads are knotted between the agate and the spacers. It would have been better to knot between the yellow frosted glass and the spacers, but the holes in yellow glass were oversized and it seemed at the start of the project that putting the pressure on the spacers and keeping the knots buried within the agate's holes would be more asthetically pleasing.

This necklace was easy to finish, since all of the beads had large, even holes that could take multiple strands of thread.  The far end was finished by stringing the last pattern in order without knotting between them, threading a 1/4 inch piece of french wire, the second closed ring, and then rethreading back through the last pattern block, placing a hitch knot between the appropriate beads, matching the pattern on the rest of the necklace.  Since I was able to rethread and hitch knot between six beads, I didn't use any glue to secure the knots.  I trimmed the tail off using a sharp razor blade.   Going back to the starting end, I threaded one of the loose tails through a full pattern block, then trimmed both remaining tails with a razor blade.

Time to Complete:  1.5 hours
Project Difficulty:  3 out of 5
Materials Cost:  Approximately $40

The Boulder Opals

Materials


Triangular, Double-drilled Boulder Opal focal bead - Australian
Simple Cut faceted Boulder Opal beads - Australian
Tobacco colored top drilled "potato" fresh water pearls - Chinese
5mm dark brown round fresh water pearls - Chinese
5mm vermeil barrel beads - Thailand
2mm vermeil round spackers - Thailand
3mm vermeil granular spacers - Thailand
Vermeil toggle clasp - Thailand
Strung on Gudebrod Chestnut 124.5 "E" Silk

Tools
#10 wire beading needle (2)
Gold "french wire" fine (1 inch)
Tri-cord knotting tool
New razor blade


This project had a few challenges to overcome, not the least was getting the lengths of the top and bottom strands correct (they aren't, yet), planning the layout of the simple cut boulder opals so the best ones are in front, but the layout is balanced, and of course, the pleasure of selecting the contrasting "filler" beads. Because the layout of this project is essential, I strung the entire necklace on monofilament first. The goal was to have the top strand lie flat and straight against my neck, taking most of the weight of the necklace; the bottom strand was supposed to swag a bit. When I tested the pre-strung version, the top strand felt a bit tight, so I added an inch to either side. Bad move. The finished version doesn't lie quite right, because the top strand is too long. I will have to cut the top strand off and restring. Sigh...

I started the stringing with the right half of the bottom strand. In addition to the challenges noted above, stringing a multi-strand necklace with a focal bead has its own challenges - mostly doing things in the correct order.

In accordance with my usual practices, I set up and strung the first part of the pattern in reverse on a single strand, then fed a 2mm round spacer, the french wire, one half of the clasp, and then a second 2mm spacer. I like the added protection that the double round spacers give, keeping the thread from rubbing against the first bead. I then knotted the strand against the spacers and started feeding the second thread through the starter pattern. Because I was using small pearls, I wanted fewer knots. Rather than a knot on either side of the pearl, so I used two round spacer beads between the pearls, and knotted between them.

When I completed the setup, I was able to string the first half of the strand without difficulty. The boulder opal beads were well drilled, with straight and even holes and the 2mm round spacer beads sat nicely against them. To minimize stress on the silk cord, I knotted the first half of the strand, finishing off the tails from the clasp by feeding one of the strands through the larger beads and including the additional strand in the knot.

To keep the thread from rubbing against the larger opening of the focal bead holes, I used a 3mm flat spacer made from round granules fused into a circle together with a 2mm spacer, and placed a knot against the assembly on each side of the focal bead. I completed the other side of the lower strand, and knotted all of the beads upto the pearls and vermeil barrel beads. Once I strung other side of the toggle clasp, again with the double spacer beads and french wire, I was able to string through each bead and place a hitch knot between the spacers, as I had done with the first half.

The top strand was strung and knotted in the same order as the lower strand, and the necklace was finished by cutting the thread tails off with a razor blade. To do this, I hold the razor blade at the edge of the knot where I want to cut the thread off, and then I pull the waste tail across the razor's edge. This gives me a clean cut without any remnants to trim or work loose. This is not a method I recommend for the inexperienced beader, as the wrong alignment of the cutting edge means you slice through your finished work.

Difficulty: 4 out of 5
Materials Cost: $275.00
Time to Complete: 7 Hours